Ancient Garrard Turntables: Still Relevant Today?

First published in Issue 139 of Copper Magazine

Ancient Garrard Turntables: Still Relevant Today? – PS Audio

Ancient Garrard Turntables: Still Relevant Today? Part Two – PS Audio

Written by Adrian Wu

When I first got into this hobby in the early 1980s in the UK, Linn ruled the land of turntables, and British audiophiles hung on to every word uttered by Ivor Tiefenbrun, Linn’s charismatic founder. Tiefenbrun preached the importance of the source component (no consumer digital equipment was available at the time, so that meant the record player, unless you were one of the real geeks listening to open reel tapes), and reputedly once quipped that a Linn Sondek played through a transistor radio would sound better than a lesser turntable (everything else) played through a hi-fi system. At that time, the paradigm for a high-end turntable in the UK meant that it must be belt-driven, with a lightweight suspended subchassis and frictionless main bearing. To prevent transmission of motor noise to the lightweight subchassis, low-torque motors were often used.

Linn did not invent this form factor, but simply borrowed the design of the Ariston RD11 (Ariston contracted out the manufacturing of its turntables to Castle Precision Engineering, Tiefenbrun’s father’s company), which in turn was “inspired” by the Thorens TD150 and the original AR turntable. This type of turntable has a readily identifiable sound, which is rather colored by today’s standard, but in a euphonic sort of way, due to the resonances introduced by the suspended subchassis. During the same period, the Japanese went the other way, with unsuspended turntables on massive plinths, opting to sink the vibrations into the mass rather than to dissipate them with springs or rubber mounts.

Looking back, it is rather amazing how the Garrard transcription turntables, so dominant for almost two decades, had been completely erased from the collective memory of British audiophiles less than a decade after production ended. Ask any young British audiophile in the early 1980s about the Garrards and you would most likely be rewarded with a quizzical stare. Ask any seasoned audiophile and you would invariably hear the word “rumble” mentioned. The only audio rag that wrote about “classic audio” at the time, Hi-Fi World magazine, had a brief entry about the Garrard 301; the only recollection I have from this write up is something about a “veiled treble.”

While these classics were being relegated to the scrap heap in good ol’ Blighty, the Japanese were buying them up hand over fist and shipping containerfuls of them back to Japan, where they were sold at multiples of their original cost. More model 301s (and 401s to a lesser extent) now reside in Asia than in their home country. Were the Japanese just a nostalgic lot, or did they know something that the British audio establishment did not?

Before the advent of the AR turntable, serious turntables usually had idler wheel drive. The Rek-O-Kut, Thorens TD124, various Lenco models, and the EMT 927 and 930 are other famous examples. The Garrard 301 was introduced in 1953, and the moniker referred to the fact that it could play in three speeds; 78, 45 and 33-1/3 RPM. The 33-1/3 RPM long-playing record had just been introduced. The first units were in a gray hammertone color, and had a main bearing lubricated by grease. The bearing came with a reservoir filled with grease, and a knob, accessible through a hole on the motor plate, can be turned to squeeze more grease into the bearing when necessary. This early version was labeled as “Schedule 1” on the name plate.

When first introduced, the 301 was immediately heralded as a major advancement in turntable design. It was widely adopted by music studios, radio stations and serious audio enthusiasts, with tens of thousands sold. The paint work was changed to a cream color in 1957 to make it look more contemporary and less industrial, and the bearing was “upgraded” to an oil version later that year. The version with oil bearing is labeled as “Schedule 2” on the name plate. The grease bearing model now commands a higher price, probably more to do with rarity than with any performance advantage. I have owned both versions, and I have not noticed any difference. Considering how old these turntables are now, the condition of the bearing probably matters more than the type of lubrication it employs.

In 1964, the 401 was introduced with a completely redesigned chassis. In my opinion, while the look of the 301 is timeless (the Volkswagen Beetle is another example of a timeless design), the 401 looks more at home with bell bottoms, wide lapels and bushy sideburns. The 401 brought some refinements, including better shielding for the motor to reduce hum, a stronger eddy current brake that allows for a wider speed adjustment, and a lamp for viewing the strobe platter. Garrard continued to produce the 301 until 1966, and the 401 was discontinued in 1976, succumbing to the competition from Japanese imports.

When I bought my first turntable, I completely believed in the dogma that turntables should have a belt and suspension. My first turntable was a second-hand Dunlop Systemdek, another Scottish creation and a descendent of the Ariston (Peter Dunlop bought the Ariston company after the latter’s relationship with Castle Precision Engineering ended.). I eventually moved on to the Roksan Xerxes, a design that purportedly addressed the shortcomings of suspended subchassis designs. The main bearing and tonearm are mounted on a lightweight MDF board, which is isolated from the bottom board by rubber mounts. The motor is mounted on the bottom board, suspended by springs.  Touraj Moghaddam, Roksan’s founder, claimed that he was inspired to design his own turntable when he noticed that music coming from his television sounded more satisfying than his Linn/Naim high-end system. Talk about turning the table on Ivor! Indeed, my Roksan had more solid, stable imaging and was less colored than the Linn Sondek. Unfortunately, it did not survive the Hong Kong humidity for long and the top board warped, which was the most problematic weakness of this product.

My next turntable was a Michell Orbe, the big brother of the famous Gyrodec. So, back to a three- point suspension system with a belt drive. However, the subchassis in the Orbe is hung from the suspension, and the low center of gravity means much better stability.

I don’t remember exactly where I first laid eyes (ears?) on the Garrard 301. It was probably in a friend’s friend’s system. Although I had heard about the revered status of this turntable in Japan, I was nevertheless quite skeptical, having been biased by all the negative views expressed by the British hi-fi brigade. However, just one audition was enough to clear away all my skepticism. Far from perfect (it was an original, unmodified machine), there was nevertheless a musicality that had been missing from all the other turntables I had heard up until then.

It is difficult to put a finger on that je ne sais quoi, but a piano sounded like a piano (and I knew what a piano should sound like, having struggled with it daily for more than 20 years at that point), which is usually not the case with record players. In fact, piano music was the only genre I preferred to listen to in digital. Everything just sounded more alive and the sound was more palpable, for lack of a better description. So off I went to look for a good clean example for purchase. I just happened to come across one at a hi-fi shop in London. It had been refurbished (clumsily, as it turned out) and was on a slate plinth, a feature I will come back to later. It also came with an SME 3012/II tonearm (the version with a plastic knife edge bearing, sadly).

First, how does one reconcile the chorus of criticisms coming from the British audio hacks to the praises sung by the Japanese audiomaniacs? I soon learned that it all comes down to implementation. Both the 301 and the 401 were sold as motor units without plinth. In the 1950s and ’60s, console music systems were common, and many consoles came with cut outs that fitted these motor units. Consumers therefore just bolted the motor unit to the console. Third-party plinths were also available, usually just boxes made from six pieces of plywood with a cutout on one surface. The Garrards have a brute of a motor that makes all other turntable motors look like toys. Many of these decks were used in radio stations and studios, where instant startup was a requirement. A 301 gets up to speed within two to three revolutions, whereas some belt drive turntables with a heavy platter and a weedy motor can take minutes. This powerful motor is the reason for the unit’s outstanding performance, but also a potential cause for its downfall. Even though the motor is suspended by springs, it still transmits a significant amount of vibrational energy to the chassis. Mounting the unit in a hollow box or a console has the same effect as a guitar or a cello with a hollow body; the resonances of the guitar and the cello give the instruments their distinct tonal character, whereas the resonances of the plinth muddy the sound of the record player and introduce rumble. To make matters worse, Garrard recommended users to isolate the chassis with springs, just to add another set of resonances! The Japanese had this figured out a long time ago. One of the earliest products to address this issue was the Shindo plinth, made from layers of solid cherry wood to “tune” the resonances. There are now many other options available, from using heavyweight materials (slate, marble) to constrained layer damping using layers of grain-oriented wood, sometimes interleaved with resin.Illustration from the owner's manual showing the top view of the Garrard 301 motor unit.

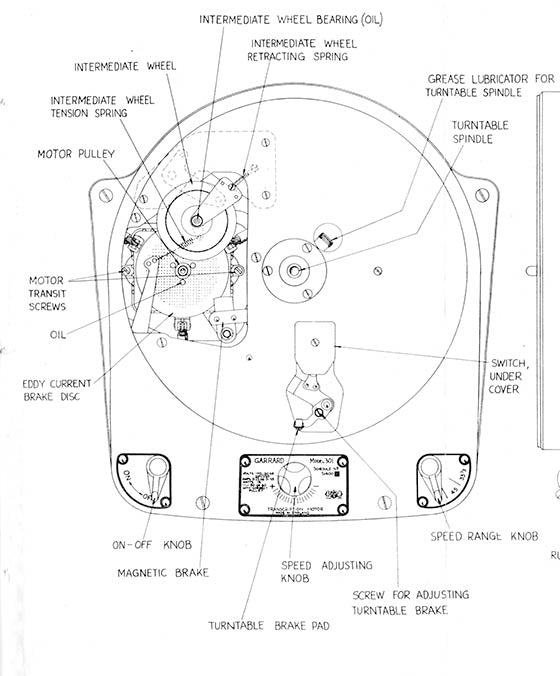
Illustration from the owner’s manual showing the top view of the Garrard 301 motor unit.

The second weakness of the Garrards is the main bearing. While it was state-of-the-art at the time, it was nevertheless a mass-produced part at a time before CNC machining was available. Moreover, most units on the market nowadays have substantial mileage and the bearings are most likely worn. The bearing can be easily removed, taken apart and examined. If it has been allowed to run without sufficient lubrication for a period of time, the housing will likely be worn, and the only remedy is a new housing. The bottom of the shaft directly abuts the thrust pad, which also gets worn out. There are third-party mods on the market that replace the thrust pad and add a hardened steel or ceramic ball bearing. These types of mods often increase bearing noise and bore a concavity on the bottom of the shaft. A loose bearing will result in the “veiled treble” described by the Hi-Fi World reviewer.

The Garrards have an aluminum platter, which was pretty novel at the time. The platter was die cast, which could result in uneven thickness. In order to balance the platter, each one was examined by hand and holes were drilled in strategic locations underneath the outer rim in an attempt to improve the balance. The platter also rings like a bell when tapped. There are several ways to address this. The cheapest is to use rubber rings that fit tightly outside the outer rim to dampen the resonances.  Micro Seiki in Japan manufactured a brass (so called gunmetal) mat that also rings when tapped (sounds like a gong), but when placed on top of the platter, the Micro Seiki mat and the platter magically cancel out each other’s resonances. These are no longer manufactured, but Puresound, a company in the UK has started manufacturing something similar, the Tenuto Gunmetal Turntable Mat. Apparently, glass mats can achieve a similar effect, but these would have to be very thick, which could play havoc with the VTA. One also needs to somehow lengthen the spindle.The author's Classic 301 motor unit with Micro Seiki gunmetal mat.

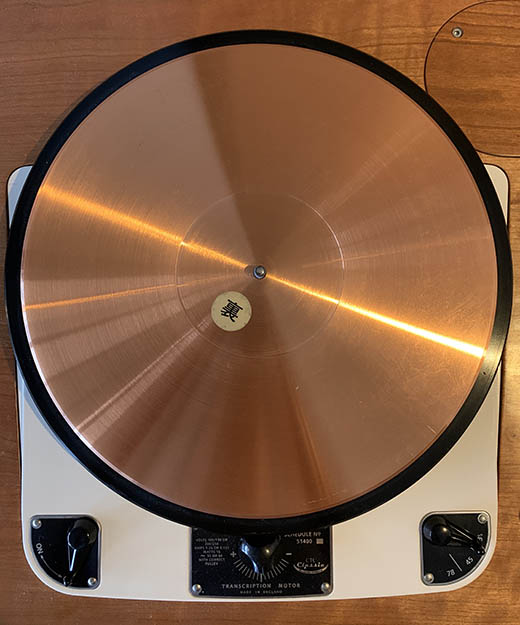
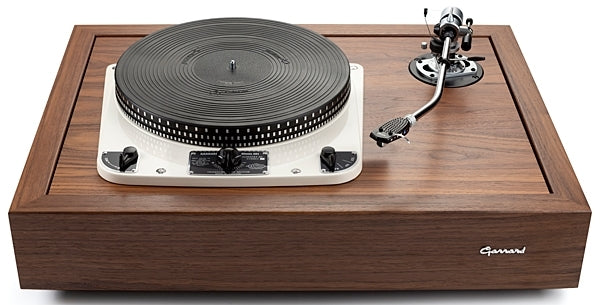
The author’s Classic 301 motor unit with Micro Seiki gunmetal mat.

Another point of contention is the eddy current brake. In the Garrard 301, an alloy disc on the motor shaft sits between two flat metal pole pieces attached to a magnet. The coverage of the disc by the pole pieces can be adjusted to increase or decrease the braking, or even be disengaged altogether. Some people think that the brake exerts unnecessary strain on the motor, which in turn can increase motor noise. However, when disengaged, the platter will run too fast. Therefore, some users opt to reduce the voltage supplied to the motor and lower the frequency of the power supply (using a regenerative power supply such as a PS Audio PowerPlant) to correct the speed. Personally, I think this is a bad idea. Most belt drive turntables have a low-friction bearing. Once the platter has gotten up to speed, the motor is only supplying enough force to overcome the friction of the bearing.

In tracking the record groove, the stylus also produces drag, and this force varies with the linear velocity of the groove (and hence decreases as the stylus tracks across the record) as well as the groove modulation. This means the drag can change suddenly as well as gradually. Imagine towing a truck across a frozen lake using a chain. You are all right as long as you are going at a constant speed or accelerating, but when you try to slow down, the truck will hit you from behind because there is no friction to slow it down. Therefore, the motor of a belt drive turntable has to prevent the platter from slowing down and speeding up by means of the belt. The belt can stretch as well as slip, and this is exacerbated by the length of the belt. The result is smeared transients and wobbly tone, which is especially noticeable with piano music. I discussed this with Tim de Paravicini after I found out that he had implemented sometime akin to the eddy current brake in his turntable (which employs a short, toothed belt between the motor and the sub-platter). He said the motor should always be working against resistance in order to respond to sudden changes in friction. In a typical turntable, when the drag suddenly diminishes (say after a loud chord played on a piano), the motor suddenly loses resistance to work against, and it will accelerate momentarily (even if there is servo control, which needs a finite amount of time to react). Once it corrects itself, it needs to slow down the accelerating platter, which is harder to do since the motor is supposed to apply force in one direction only via the belt (like trying to slow down the truck via the tow chain).Illustration from the owner's manual showing the side and bottom views of the Garrard 301 motor unit.

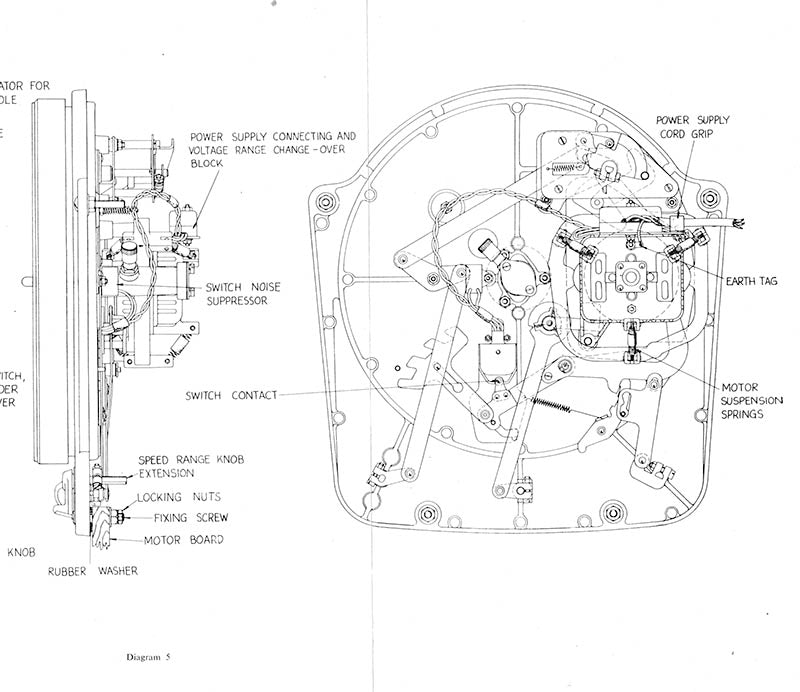
Illustration from the owner’s manual showing the side and bottom views of the Garrard 301 motor unit.

There are ways to ameliorate this problem, such as using heavy platters, flywheels, multiple motors etc., but each solution brings its own set of problems. In the Garrard, the motor is coupled to the rim of the platter via an idler wheel. Unlike a belt, there is no stretching and minimal slippage, and the tight coupling makes it easier to slow down as well as speed up the platter. The eddy current brake applies a constant opposing force on the motor, which is orders of magnitude greater than the stylus drag. Any sudden change in stylus drag therefore only represents a small percentage of the overall resistance, and its importance is greatly attenuated. This accounts for the superior transient response and tonal stability of this turntable.

The idler wheel system can also be a source of trouble. The coupling of the idler to the motor pulley and the platter is regulated by springs. With age, the spring tension diminishes and speed stability suffers. The rubber rim of the idler wheel also hardens with age, losing grip and increasing the transmission of vibrations. If the idler wheel is left engaged with the power turned off, a flat spot on the rubber rim will develop, which will lead to speed fluctuations. Therefore, the turntable must always be turned off at the switch, not simply by cutting off power.

In Part Two, we will look at modern upgrades for Garrard turntables, and the SME re-issue of the legendary model 301.Garrard owner's manual: the hard back and gold lettering meant business!

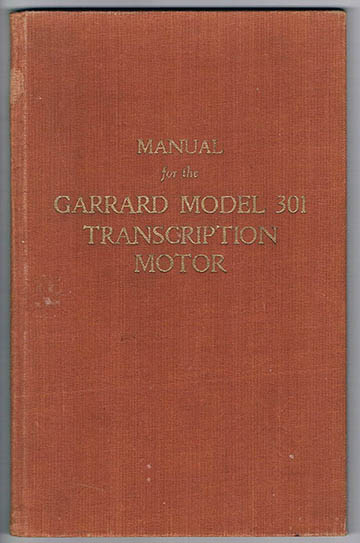
Garrard owner’s manual: the hard back and gold lettering meant business!

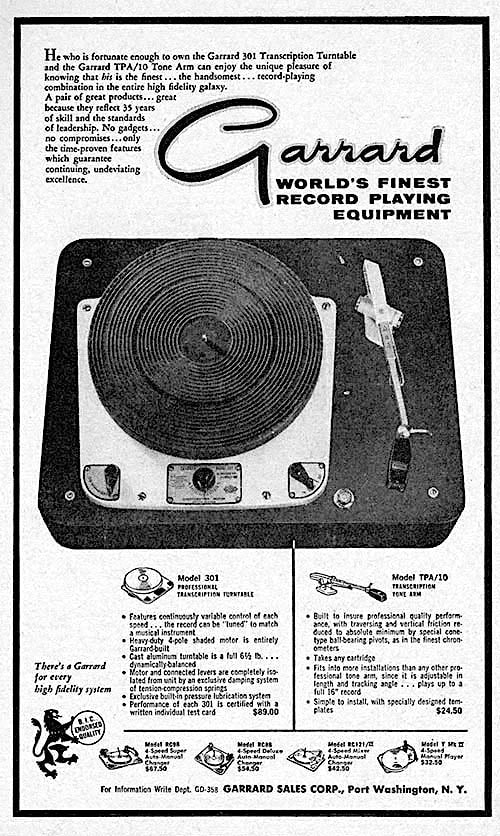
Header image: Garrard 301 turntable ad, 1958.

In Part One (Issue 139), Adrian Wu outlined a history of Garrard 301, 401 and other turntables, and provided an in-depth examination of their advantages and foibles. Part Two concludes with a look at some modern upgrades, and the SME re-issue of the legendary model 301.

The Garrard company was founded in 1735 as a jewelry maker, and it remains a high-end jeweler by appointment to the Queen to this day. The company founded a subsidiary, Garrard Engineering and Manufacturing Company, in 1915 to produce motors as part of the War effort. After World War I ended, it needed to reinvent its business and entered the nascent gramophone manufacturing sector. Decades later, after losing market share to Japanese competitors, the parent company sold the business to a Brazilian investor in 1979, who ended its business activities. Loricraft, an English company specializing in record cleaning machines, licensed the Garrard name in the 1990s and provided servicing for the Garrard turntables. They also re-manufactured many parts, designed new plinths, and eventually produced a Garrard 501 turntable of their own design. This turntable was regarded as an oddity at a time when belt drive ruled the roost, and the mainstream British audio press never took much interest in it.

In Japan, Ken Shindo had been working on the 301 since the 1960s and had come up with a new main bearing, idler and platter. Together with his plinth, a 12-inch tonearm modeled after the classic Ortofon RF-297 and a highly modified SPU cartridge, the record player was sold as a complete package. This record player was and still is taken very seriously indeed by the Japanese audio community. Loricraft and Shindo remained the only game in town, if you didn’t want to get your hands dirty and work on refurbishing turntables yourself, until the early 2000s. With a revival of interest in these classic turntables outside Japan, many companies have sprung up in the last 15 years to provide servicing and modifications as well as plinths.

Slate Audio (now defunct) was one of the early players, and they claimed slate has a natural structure well suited to damping the vibrations of the Garrard motor. The first 301 I bought had a new paint job and zinc plating of the links that operate the idler wheel mechanism (the originals were plated in cadmium, a toxic metal), but everything else was original. The color of the paint did not quite match the original, and the zinc plating started to peel off after a while. I also discovered that the power cable to the motor was not rewired in a safe fashion. The slate plinth had a faux marble outer finish that looked good enough, but the finish of the edges was rather rough. Nevertheless, it was cheap, at 1,000 pounds (in 2003) for the whole lot including tonearm and a slightly used Clearaudio cartridge. It had some wow until I bought a new idler wheel and a set of springs from Loricraft, which fixed the problem.

After a couple of years, I came across a cream-colored grease bearing unit, which I bought to replace the oil bearing unit while keeping the same plinth. There was not a lot of difference sonically between the two units, but I believed the design was capable of a whole lot more. The sound was lively, impactful, with solid imaging, but the pitch was still not as stable as it should be, and the frequency extension could have been better.

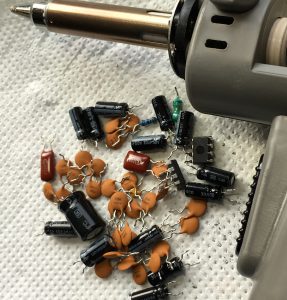
I then came across a new main bearing that was receiving a lot of rave reviews on the bulletin boards. The company was called Red Beard Audio, and it was basically a one man operation. The guy owned a machine shop and produced every bearing himself by hand. It has an oversized shaft and housing with very tight tolerances, and does not rely on bushes, ball bearings or thrust pads. It uses a highly viscous synthetic lubricant that has a consistency between oil and grease. It was a major improvement over the original bearing, with vastly improved frequency extension and a tighter impact. He was very successful initially by all accounts, with a large backlog of orders.  Sadly, he had some quality control issues once he started to scale up production, and some unhappy customers demanded replacements, which he was not able to fulfill in a timely manner. Some of these irate customers became very vocal online, which led to the collapse of his business. Being an early customer, I have had no issue with the part, which is still working perfectly with no sign of wear after more than a decade.

During this time, I also upgraded the knife-edge bearing of the SME 3012/II tonearm and rewired it. With the new main bearing, the turntable has finally reached a satisfactory level of musicality. However, I was still in constant search for perfection, and two obvious areas for improvement were the plinth and the chassis.

People argue endlessly about the overall merit of a slate or marble plinth versus a wooden plinth with constrained layer damping. The former aims to sink the vibrations into the mass, whereas the latter is supposed to spread the energy over a wide range of frequencies. Advocates of wooden plinths claim the slate deadens the sound, whereas the other camp claims that the “tuned” plinths color the sound. As for the chassis, the original 301 chassis was made of cast aluminum. It is only supported around the edge where it sits on the plinth, and it is possible to flex the center of the chassis if one pushes down on the bearing. This lack of rigidity means vibrations from the bearing gets reflected back to the platter, record and stylus. The 401 chassis addressed this issue with bracing underneath to make it more rigid, but the 301 chassis looks way cooler.

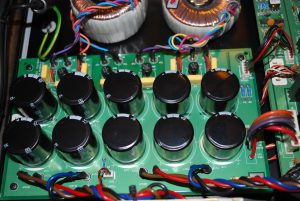
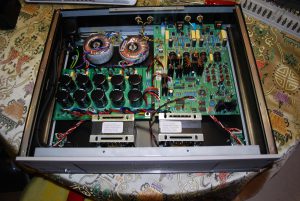
I found a company in the UK called Classic Turntable Company that machines new 301 chassis out of blocks of aluminum twice as thick as the original. Every detail of the appearance is the same except for the four bolt holes. Instead of inserting the bolts through the chassis, the bolts are screwed into the bottom of the chassis like the 401. The company also produces platters with perfect balance, made from machined aluminum or brass, as well as an improved idler wheel and main bearing. I therefore packed up my motor unit and shipped it to them. They stripped and rebuilt the motor, stripped and chrome plated the links, replaced the springs, idler, spark suppressor and chassis, and replaced all the wiring. I also bought a new aluminum platter. I did not replace the bearing, as the Red Beard remained in perfect working order.

In essence, I got a new turntable unit except for the bearing, links and motor. The company also recommended a cabinetmaker who had been making plinths for their customers for many years. I bought a solid cherry wood plinth with a natural finish. This new round of upgrades cost around 2,500 pounds, a bargain in high-end terms.

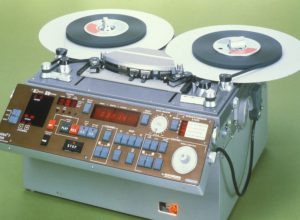
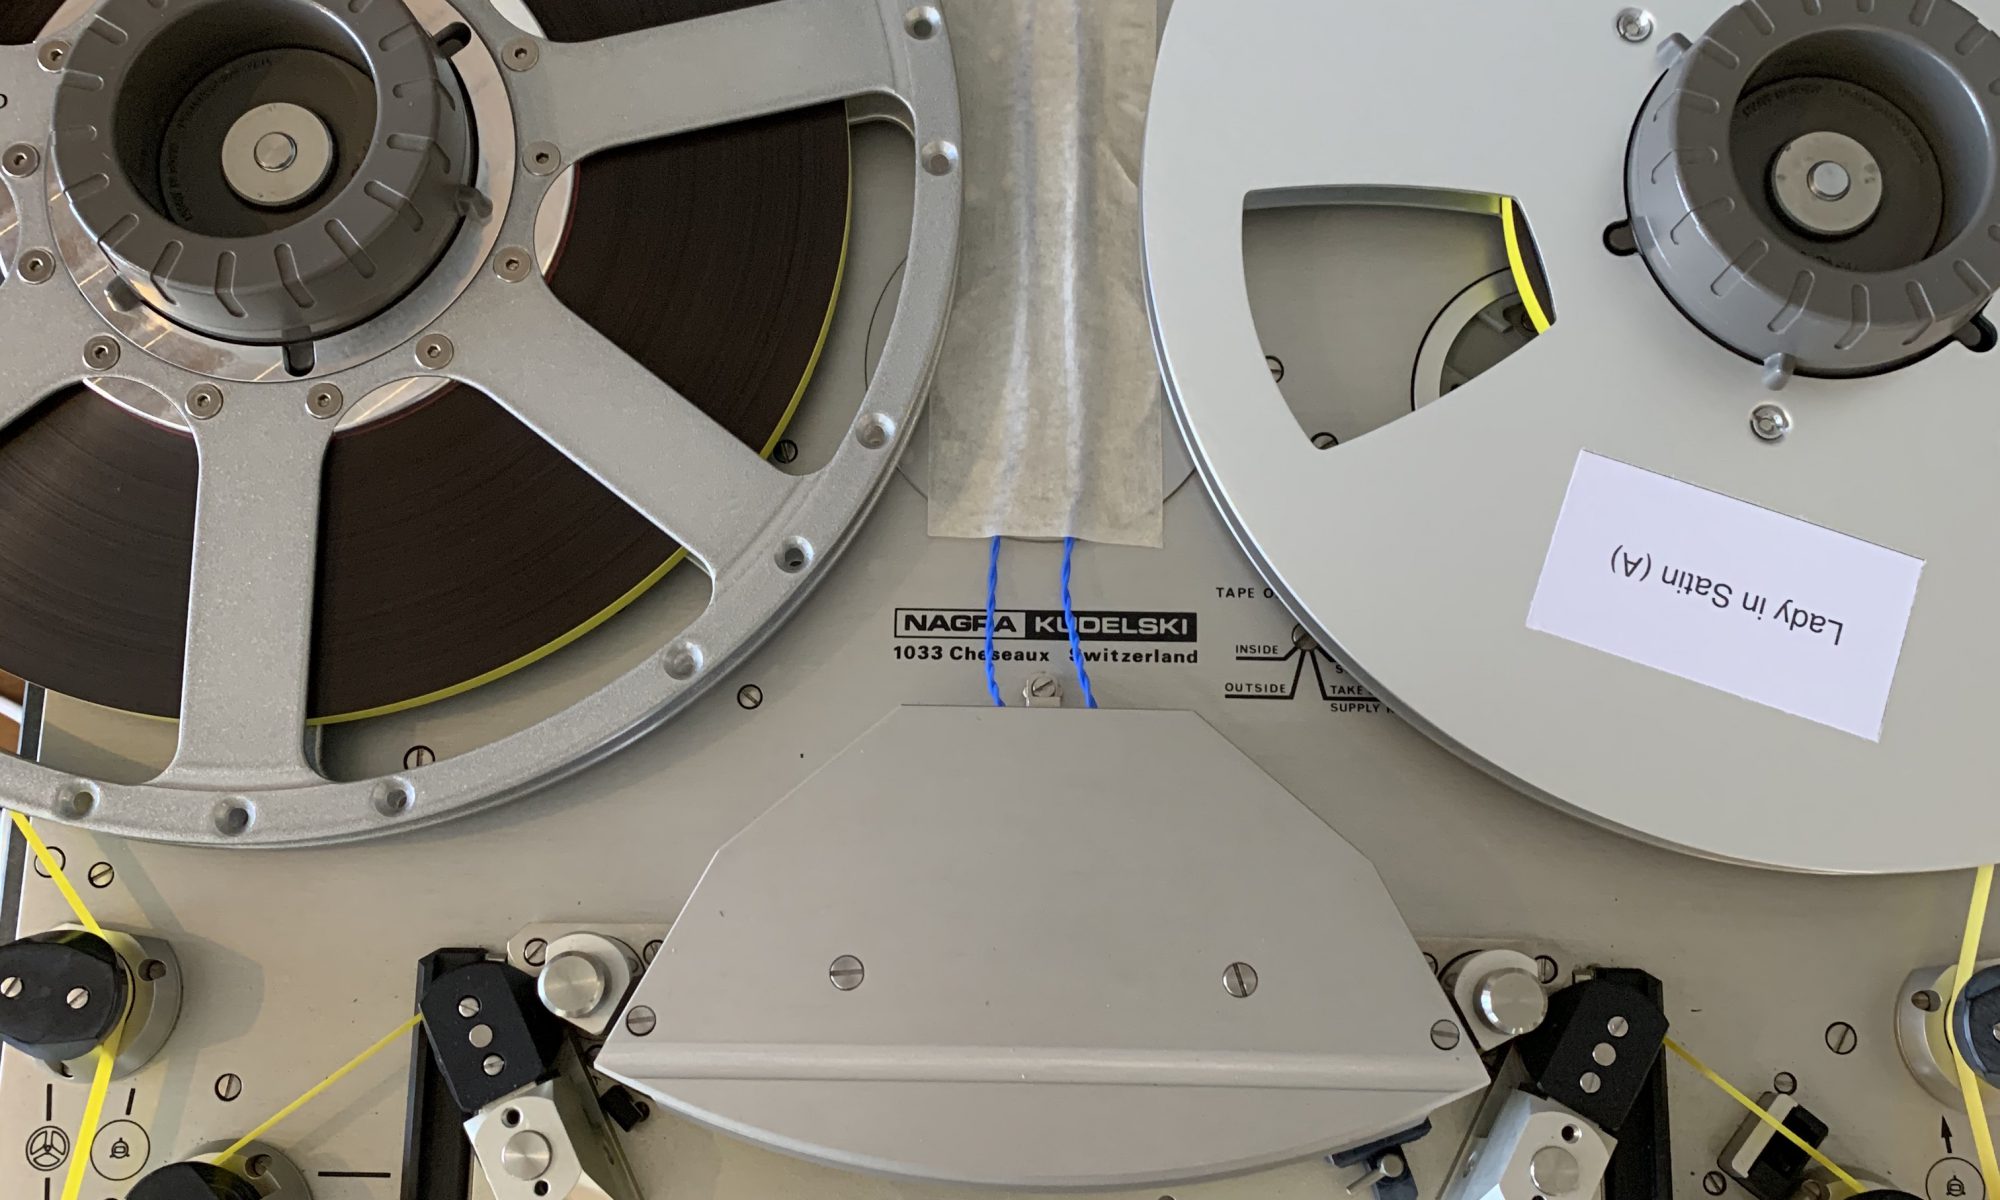
The whole thing came together nicely and the record player has ascended to the next level of excellence. With well-mastered LPs, the performance approaches that of tapes played on the Nagra T Audio open reel deck. I can still identify some deficiencies, such as a slightly emphasized mid-bass, but I suspect this might be due to the tonearm. The tapes still have a bit more of that eerie see-through quality, and the soundstage is wider and deeper still. However, this record player is now competitive with some serious high-end turntables.Adrian Wu's completed Garrard 301 with solid cherry wood plinth, Tenuto gunmetal turntable mat, modified SME 3012 Series II tonearm and Ikeda 9TT cartridge.

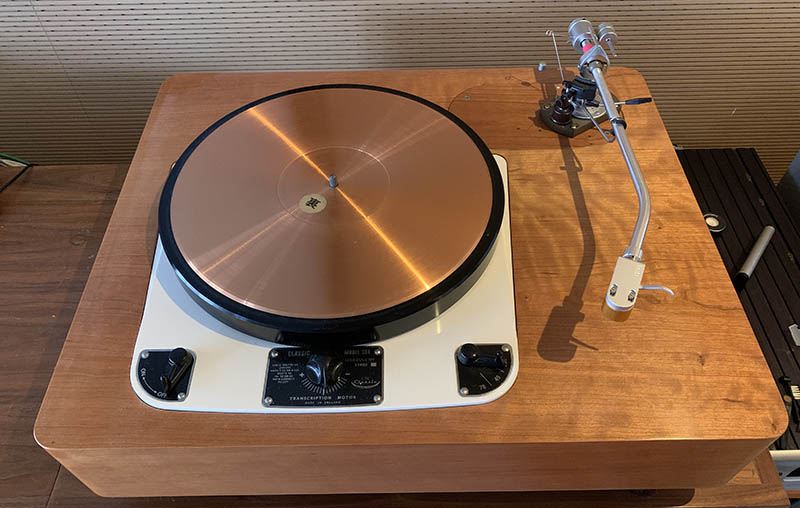
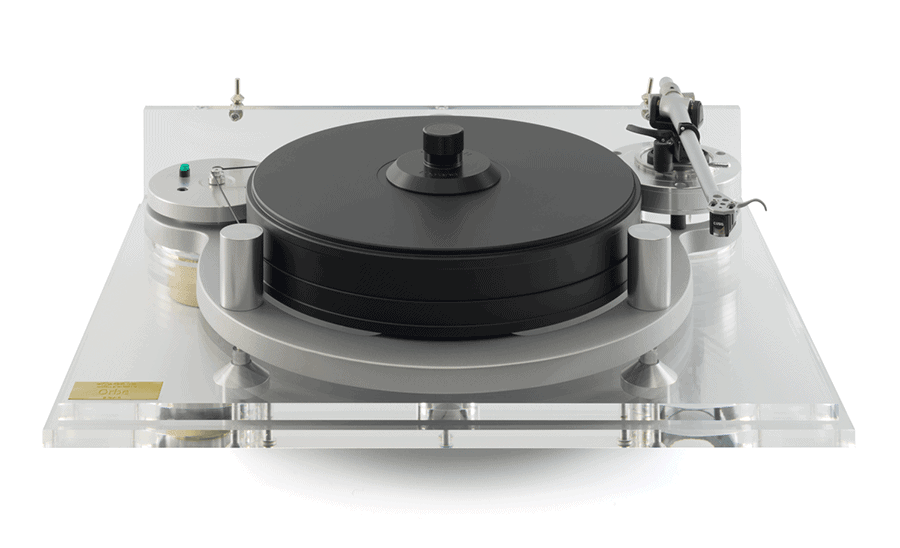
Adrian Wu’s completed Garrard 301 with solid cherry wood plinth, Tenuto gunmetal turntable mat, modified SME 3012 Series II tonearm and Ikeda 9TT cartridge.

In 2018, SME announced that they had bought the Garrard trademark, as well as the Loricraft company. The following year, they showed a “new” original 301 built with New Old Stock (NOS) as well as remanufactured components. The plinth follows the Loricraft design, which has a top plate supported by four rubber mounts, similar to the Roksan. The machine is only sold with a 12-inch tonearm, a descendent of the 3012. I have not seen an official price yet, but have heard various estimates from £12.5K to £20K.

[Note: as of press time, there is a website with an official-looking web address for Garrard, but when attempting to log on, a warning message comes up that the connection is not private and the site may be trying to steal information. No information about the new turntable is available on the SME website. We will attempt to find out more. – Ed.]

While I am happy that these classic machines have again re-entered the mainstream consciousness, I cannot help but wonder if SME got it wrong. Re-creating the machine exactly as it was might appeal to vintage audio enthusiasts, and there is certainly a market for that, but most audiophiles are interested in this design for its potential to achieve state-of-the-art performance using modern manufacturing technology. That is why so many people have worked on improving the parts. SME, being a top precision engineering company, should be perfectly placed to make significant advancements. Will serious audiophiles pay £12.5K for something manufactured with 1950s technology? Of note, Thorens went so far as to “update” their classic TD124 with direct drive. I feel this might be going a bit too far, since the idler wheel drive of that machine is the soul of the design. They should perhaps offer two choices, idler wheel or direct drive. The proof of the pudding is in the eating, and I look forward to the chance to audition the “new” 301 in its original glory, and would love to be proven wrong.

Here are links to a few other vintage Garrard restoration specialists and parts companies:

Layers of Beauty: a specialist antique furniture restorer, cabinet maker and plinth maker for vintage turntables.

Artisan Fidelity: this US-based company is a restorer of vintage turntables and plinths, offers upgraded parts, and is also a retailer for a number of high-end brands.

Perfect Sound: the largest spare parts manufacturer for Garrard turntables, and an authorized Loricraft parts supplier.

Woodsong Audio: the company offers Garrard, Thorens and Linn Sondek LP12 restoration, plinths and parts, as well as a variety of cartridges, tonearms and other products.

TJN Analog/ Turntables by Jean Nantais: he restores Garrard, Lenco and other turntables.

An Audio Journey

First published in Issue 120 of Copper Magazine

An Audio Journey – PS Audio

My Audio Journey, Part Two – PS Audio

Written by Adrian Wu

Copper reader Adrian Wu lives in Hong Kong and has spent time in the UK and elsewhere, as you will see. He is a contributor to the Asia Audio Society website, dedicated to reference-quality sound and reproduction. As you will also see, Adrian, like so many of us, has had quite an audio journey, which he is kind enough to share with us and which we will run in two parts, to be concluded in Issue 121.

I would like to say thank you to everyone involved in Copper. For me, this is the one true magazine for music and audio lovers, devoid of commercial interests and packed full of practical information, learned opinion and thought-provoking comments. Looking back at my audio journey of almost 40 years, I have made many friends and continue to learn new things every day that I will treasure for the rest of my life. And I get to use the stuff I learned in my physics and math classes at school!

I have been a music lover all my life. I started learning the piano at the age of eight, and I was very fortunate to encounter my second teacher after I started boarding school in the UK. He was a retired concert pianist with a mind-boggling repertoire, but he also taught me a lot about how to be a decent and honorable human being. From that day on, music became a major focus of my life.

My introduction into audio came after I joined the electronics club organized by my high school physics teacher. One day after our club session, he asked for volunteers to help him with a project in his home. My friend and I volunteered, and that was the first time I laid my eyes on the Quad ESL electrostatic loudspeaker (or any audiophile equipment for that matter). At the time, the ESL was still available new from the factory, but being a high school teacher, he could only afford a second hand pair. He wanted to upgrade the EHT power supply unit, and we helped him remove the covers. Not having allowed them enough time for their membranes to adequately discharge, he stuck his hand in and was promptly thrown back several feet onto his butt by the 6000 volts (thankfully of high source resistance) still lurking around.  Having witnessed this debacle, I knew that instant that these were the speakers for me.

Quad advertisement from Audio, October 1959.

During my university years living in Edinburgh, I eagerly awaited every new issue of Hi-Fi News & Record Review. I saved up my allowance (not having a girlfriend helped) and bought my first stereo, which was made up of the Dunlop Systemdek II turntable (aka the “pressure cooker”), Mission 774 arm (designer John Bicht’s classic) and Audio-Technica AT33 cartridge.  Amplification was an Arcam integrated, driving KEF Coda 3 speakers. A Frenchman operated a used record store at his wine shop in New Town, and I bought the wide- and narrow-band Deccas (the wide band issues were the early premium releases, including the whole SXL2000 series, and the early SXL6000 series from 1962 until 1970. These were mostly produced with tube electronics. The later SXL6000 narrow band issues were all produced with solid state electronics), EMI ASDs and SAXs, French Pathé Marconis and Lyritas etc. that nobody wanted because the CD offered perfect sound forever. As the Scots were frugal and took great care of their possessions, the LPs I bought were mostly pristine. These still make up the core of my record collection. I investigated CD audio, and decided it was not for me.  CDs cost 10 pounds in those days, whereas I could pick up a mint second hand Decca LP for about 2 pounds.

“Narrow band” Decca label.

“Wide band” Decca label.

My classmate Neil was a Linn evangelist. After he saved up enough money, we went to the Linn dealer in Edinburgh to audition the Linn Sondek LP12 turntable. The salesman (barely out of high school) was shocked that someone wanted to actually listen to the thing. What was the point of auditioning since the product’s superiority was cast in stone? He took one out of storage, got it out of the box, plonked it on top of the box, hooked it up and put on a record. It might have been Steely Dan’s Gaucho if I remember correctly.

The record player had an Ittok arm and a Karma cartridge, top level in those days, but we could see the suspension bouncing in every direction except vertically. The cartridge mistracked every few revolutions and the sound was awful. After a few minutes, my friend leapt up from his seat and exclaimed, “That’s wonderful. I want one now.” And he parted with his cash, hard-earned during years of summer jobs (and no girlfriend), just like that.  Talk about Ivor worshipping!  The next time I visited Neil, he proudly played his copy of Gaucho through his officially approved system consisting of the LP12 with Naim Nait electronics and Linn Kan loudspeakers.

I credit Mr. Winston Ma (better known outside Hong Kong as the founder of the record label First Impression Music) for my early education in all things audio. During my holidays when I would go back to Hong Kong, I loved to hang around his shop, Golden String, in the Central business district. He was already very well-known and well-respected within the industry in those days, but he and his staff would spend hours explaining things to me, someone who couldn’t even afford the cheapest merchandise in his shop. He was the agent for brands such as Cabasse, Burmester and Koetsu, not exactly equipment that a university student could aspire to buying.

One day, a customer walked into the shop in the middle of the afternoon. He was dressed in the type of clothes worn by men who pulled rickshaws and by dock laborers, and he was wearing dirty old canvas shoes (way before those became fashionable). He did not know who Mr. Ma was, but nevertheless, Mr. Ma greeted him warmly and spent a lot of time introducing him to various products. At the end, he pulled out a pile of cash from his pocket and bought a top Koetsu cartridge. I was totally amazed and said so to Mr. Ma. I will always remember his response. “To be successful in selling hi-fi is no different from what you need to do to be successful in life,” he said, “and that is to treat everyone as equal and with respect, no matter if you think they are rich or poor, smart or dumb, well or poorly educated.” This advice has served me well.

A current Koetsu Rosewood Signature Platinum cartridge.

Many years later, after he had emigrated to Seattle, we worked together on a project to release a series of recordings I had made for a Chinese violin prodigy (and that is another long story). Unfortunately, this project did not come to fruition due to his illness and untimely demise. I still go past that building from time to time, and the large window on the first floor is still the same after 35 years, only without the large Golden String logo. It still brings back fond memories.

After graduation and actually living off the fruits of my own labor, I saved enough money to buy an “antique” Bösendorfer (1928, to be exact) piano. A few years later, I sold my original system to a friend (who had been coveting it for some time), and upgraded to a Roksan Xerxes turntable with Artemis arm, Mission Cyrus integrated amplifier and Linn Tukan speakers. A chance encounter led me to move to the US for postgraduate training. I arrived with just a suitcase and rented a studio apartment, the only criteria being that it was large enough to accommodate my piano.

I bought a futon that folded into a sofa, which was the extent of my furniture. Fortunately, my piano arrived soon afterwards, having been sent away ahead of time for an overhaul, and then directly from the workshop to my new address. It also became my writing desk and dining table for the next year.

I was afflicted by the common audiophile malady of upgrade-itis, and soon ditched the Cyrus (since it had no option for 110 volts and needed a transformer to operate in the US) for a used conrad-johnson PV10a preamplifier (tubes!) and Aragon 4004 power amp. I didn’t go for a tube power amp after considering the potential maintenance cost. Being in an extremely busy job with a brutal call schedule meant not much time for music, but I did manage to start taking weekly piano lessons from a professor at The University of California, San Diego (and falling asleep during the lessons).  She (in fact, her husband) had extremely impressive wall to wall shelves loaded with LPs along the corridor and the living room.

Another six years went by, and after landing an academic job back in Hong Kong, I moved back after having been away for 19 years. I soon picked up old friendships and made new ones. An old family friend introduced me to someone who had been into music recording since he was at university in Los Angeles during the late 1970s. Having known noted recording engineer and producer Allen Sides for a long time, he had a nice collection of vintage microphones (being a top investment banker in Hong Kong helped) and recorders.  We could therefore play with his Neumann U47, U67, M49, M50 and AKG C12 mics, and even a mint condition Telefunken ELA-M251.

My new friend also needed a few able bodies who were willing to help him haul around tons of equipment. Together with another friend (a real estate guy) who had set up a mastering studio to keep himself amused, we managed to get a contract (pro-bono) with the Hong Kong Philharmonic to record some of their dress rehearsals and concerts for their archives. (Their employment contracts with musicians in those days excluded permission to make commercial recordings.)

We would set up the microphones early in the morning (usually on a weekend) for the afternoon rehearsal, and then the evening concert. We usually limited ourselves to eight microphones (to lighten somewhat the back-breaking labor), arranged in a “Decca tree” configuration behind the conductor, with two flanking mics and a few spot mics for the percussion, basses and wind instruments depending on the program. At my friend’s urging, I found a Nagra IV-S stereo analog recorder with a QGB 10.5-inch reel adapter in a BBC sale in London for 2,000 pounds. Another 800 francs for new heads and a once-over at Nagra, and it was good to go. I was also offered a Telefunken M21 tape recorder for 800 Euros, which I turned down due to a lack of space. They were throwing these out of radio stations in Europe to replace with DAT machines in those days. Apparently, the same stations were buying them back a few years later when they realized that some of the DAT recordings were having dropouts and becoming completely useless. I would have bought a Studer A820 deck if I had space; they didn’t go for that much in those days! We would feed the mics into a Studer analogue mixer, and the stereo out into a splitter to feed our two Nagras, and line level outputs from the mixer would be fed to a digital multitrack recorder for use by our real estate friend. For monitoring, we used active Tannoy loudspeakers.

Nagra IV-S recorder.

All that ended when the now-current director of the orchestra came in and did not want to continue with the arrangement, but it was fun when it lasted. At least, we got almost all the Mahler symphonies on tape (but not the 8th, sadly).

Back on the hi-fi front – the subchassis of my Roksan turntable warped after less than a year spent in Hong Kong. Apparently, this was a common problem in humid climates. Therefore, off I went to buy a new turntable from Excel Hi-Fi (now defunct), the biggest dealer (at the time) in Hong Kong. I decided to buy a Michell Orbe turntable with a Graham 2.2 arm and Lyra Helikon cartridge. The salesman was an industry veteran whom pretty much every audiophile in Hong Kong knew. When I enquired if he was going to set up the player for me, he sneered and said, “if you can’t set up a turntable yourself, you shouldn’t be in this hobby!” Having had 15 years of experience with turntables by then (and still having reasonable eyesight), I could of course set up the rig, but I expected some service after having spent that much money (which was of course peanuts from his perspective). In any case, we became good friends nevertheless, even though I never bought anything else from the shop.

After some time I was able to buy a flat. I finally had a chance to indulge in my childhood dream – the Quad ESL! During a trip to visit my sister in Leicester, England, I came across an ad in the local newspaper for a pair of Quad ESL loudspeakers and Quad II amplifiers. I borrowed my sister’s car and drove to meet the seller at a council estate. The ESLs were in excellent cosmetic condition, and at a very low price (something like 200 pounds). The amps were a bit beaten up but the price was also low. I bought the whole lot and spent the next few days packing them up to ship back home.

After the gear arrived at my home, my old electronics skills came in handy. I went shopping for a soldering station, oscilloscope, multimeter and tools. My recording partner was a wellspring of information, having been introduced to the world of vintage audio by his friend, legendary audio publisher and manufacturer Jean Hiraga, and having a collection of vintage gear to rival his mic collection (Western Electric amps, tubes, drivers and transformers etc.). He came over and we checked out the speakers. The voltage was weak, and the panels had faded. I therefore had to order new EHT units and panels from One Thing Audio, and the two of us rebuilt the speakers over the Easter holidays. The hardest part was installing the panels, and having to remove uncountable numbers of splinters from my fingers afterwards.

The amps were in their original state, which means wax leaking out of the transformers and components with badly drifted values. When researching about restoring these pieces, I came across a local chat group that provided a lot of information. I made friends with the administrator Tim, another banker. He is a walking encyclopedia of vacuum tubes and vintage hi-fi, especially British products, since like me, he went to boarding school in the UK.  He can recite all the structural variances of different vintages of most of the common audio tubes from Mullard, Telefunken, Amperex and so on. He is a great one to consult on the authenticity of NOS (New Old Stock) tubes. He and two partners own a vintage hi-fi shop called Vintage Sound, which is really an excuse for them to buy stuff. Tim had collected pretty much every make and vintage of the classic BBC LS3/5a studio monitor speaker over a couple of decades (another anomaly of British audiophiles of our vintage, thanks to Ken Kessler), including a pair of rare prototypes with screwed-in back panels, until thieves broke in and stole the whole collection one weekend. They didn’t steal anything else, not even the rare tubes in the display cabinets. I guess they were too busy trying to remove the haul without being caught. I had never seen my friend so distraught, and he spent the next few years going around the second hand shops in Hong Kong and Guangzhou trying to buy back whatever he could.

Jean Hiraga with Adrian’s friend Tim at Vintage Sound.

In his shop, I have experienced some of the weirdest and most wonderful things: Quad corner horn loudspeakers, Lowther back-loaded horns, the original Williamson amp with Partridge transformers as well as pretty much every amplifier ever made by Leak, Radford and Pye, and all the vintage Tannoy drivers (one of his partners’ nicknames is “Tannoy Silver”).

One of the friends in our group was a German named Dieter. Dieter started working at Siemens when he was still in high school (his mom worked in the vacuum tube division of AEG), and stayed with the company until his retirement as the general manager of its medical business in Hong Kong ten years ago. A properly trained electronics engineer (meaning he studied vacuum tubes and analogue electronics), he had kept a copy of any datasheet, manual and schematic that he had ever come across at work, filed away in the typical meticulous German manner. He could recite off the top of his head the specifications of many Siemens tubes and parts. He had an enviable collection of C3M, AD1, EL156, F2A11 and other rare tubes, as well as Sikatrop capacitors and other vintage parts, and introduced these to me via the lovely amplifiers he built in his spare time. Sadly, he left Hong Kong and went back to Hamburg after his retirement, rented a garage and started rebuilding vintage Mercedes sports cars.

Having been bitten by the vintage bug, I started to look into this side of audio. Those were the days when one could still find good stuff on eBay. Having restored the Quad II amplifiers, I then realized that contrary to popular belief, they were not the best mates for the ESL speakers. One listen to my friend’s Mark Levinson ML2s driving the ESL put that myth to rest. I went off hunting for deals, and managed to score a pair of Leak TL12.1 amplifiers and a pair of Brook 12A and Telefunken V69a amps over the next few years. I started researching into vintage components, such as antique carbon composition resistors and their modern equivalents (like Kiwame carbon film resistors and so on), antique oil capacitors (TCC Super Metalpacks) vs. modern ones (Jensen and Audio Note PIO or paper in oil caps), chassis wires and other components.

Telefunken V69a amplifier with new chrome face plate.

Looking at the construction of the three amps sort of tells you the very different approaches the manufacturers took in building the amps. The Leak is very neat, with all the components mounted on a tag board. That might mean an unnecessarily long signal path, but it makes working on the amps very easy. All the wiring is in looms, tucked into the corners. In fact, having worked on these amps, I can tell you that any deviation from the original wiring arrangement could result in extra noise.

Telefunken V69a interior. Note the original wirewound resistors and ceramic-encased Siemens Sikatrop capacitors. Extreme quality here.

The original TCC oil coupling caps that came with those amps were electrically leaky. They had rubber end caps, unlike their superior military grade “Super Metalpack” cousins. The rubber had all hardened after decades. I put in some industrial polypropylene and foil caps  and replaced all the resistors, which had all drifted in value, with Kiwame carbon films, to make sure the amps worked before investing in more expensive caps. Everything measured correctly, and indeed the amps sounded fine. I then ordered some copper foil PIO caps from Jensen and put those in.

The difference was obvious and can be summed up this way: with the plastic caps, I was listening to Carol Kidd singing. With the PIO caps, Carol Kidd was singing to me. I could experience more emotion and nuances, the little inflections in tone, the little mannerisms.  The Super Metalpacks sounded a little more laid back but again had that organic quality missing from the plastic caps.

Leak TL12.1 amplifier. Note the open mains transformer signifying an earlier generation model. The author is using the older black base GEC KT66 rather than the more common brown base.

One issue with vintage amps like these is the difficulty in getting the old (no longer legal by today’s standards) power connectors. No IEC sockets on these. Fortunately, an old wireless (radio) shop in Kowloon still had a stock of these now-illegal connectors in their warehouse, which they were happy to sell to me, as well as some octal plugs that have also become hard to find. They also had a stash of NOS vacuum tubes for TV sets (the audio tubes were long gone) that they still displayed on their shop window, but that probably nobody had bought for 40 years. The shop was packed top to bottom with parts, but the two ladies who ran the store always knew where everything was. After having been in business for more than 60 years, it sadly closed its doors about 10 years ago.

Leak TL12.1 interior. The author has substituted the original carbon composition resistors with Kiwame carbon film capacitors, the original TCC Metalpack coupling capacitors with the TCC Super Metalpack capacitors, and the cathode bypass electrolytic capacitors with Solen polypropylene film capacitors. The author is allergic to electrolytic caps, and would not allow any to contaminate his system.

In my quest for ever-better sound I had purchased a pair of vintage Brook 12A amplifiers – but they came with a story. These amps use 2A3 output tubes in push-pull configuration, and were supposed to be Paul Klipsch’s favorite to drive his Klipschorns. The seller told me that the amplifiers he was selling were defective, the reason for the low price. He had bought them in a non-functioning state and had hired a technician to restore them. However, they sounded distorted even after restoration.

The Brook 12A amplifier.

The original wiring of the Brook was a rat’s nest, unlike the British and German amps I had encountered. After I received the amps, I confirmed that the sound was indeed distorted. I downloaded the schematic and checked the wiring. Everything appeared to be in order. I studied the schematic carefully and noticed that the polarity of one bypass cap was reversed. The cathodes of the 2A3s are directly connected to ground via the heater transformers, which means the control grids are at negative potential. The cap that bypasses the grids to ground should therefore have the positive terminal connected to ground, instead of the negative terminal as shown on the schematic. The technician must have used the same schematic (there was only one schematic on line as far as I could find), and made the same mistake. It would have been fine if he had used non-polar electrolytics. After reversing the polarity of the capacitors, the amps sounded like magic. I wrote to the seller to give him the news, and he was not pleased!

The next question was, which components should be used to restore the Brook? I tried Jupiter wax capacitors (the original version), which was a mistake, as they didn’t do well with the heat generated by the amplifiers. There was a temptation to use American components of the same vintage as the amps, such as the Sprague Black Beauties, but I worry about the reliability of these ancient components. I ended up putting in antique Siemens paper caps, since I had the right values on hand. For resistors, I used my favorite Kiwame carbon films. These retain the tone of the carbon composition resistors while maintaining stability, and they don’t burst into flame either. For chassis wire, I removed the cheap wire the technician put in, and used new production cotton-sheathed copper wire to maintain the antique look.

Interior of the Brook 12A amplifier, showing the Siemens coupling capacitors.

The pair of Telefunken V69 amplifiers I also bought around this time period actually came as a V69 and a V69a. The difference being that the older V69 has EF12 metal pentodes at the front, and the V69a has EF804S (glass) tubes. Coincidentally, my recording partner had a mismatched pair of V69/V69a amps as well. We therefore did a swap, and he kept the V69s, while I kept the V69as. The amps I bought had been sitting in a basement somewhere in Germany for 40 years. The metal had rusted, but with a bit of elbow grease, the layer of rust was removed from the very sturdy steel cage. The amp is a beautiful example of German quality and precision. Paper capacitors were used throughout, with not a single electrolytic to be found. All the resistors (wirewound) had retained their original values. All the caps were encased in ceramic, and therefore should last forever. I went through and checked everything several times, and decided to bite the bullet and just turn them on to see if they worked. I did not even use a Variac (to gradually bring them up to operating voltage, which is recommended when powering up vintage gear); I just plugged them in and flicked the switches. No bang, no smoke, even the indicator lights worked. I adjusted the tube bias and played some music. There was no noise, but there was some distortion. However, it was amazing that these amps with their original tubes were stored in a dank basement for 40 years and still worked almost perfectly without restoration.

Telefunken V69a amplifier with new chrome faceplate.

The frequency response of the amps was way off. It turned out that the insulation of the input transformers has broken down after all those years. Teflon wasn’t available for transformers in those days, and they used paper insulation. The dampness in the basement had destroyed the insulation. I contacted Telefunken USA and they were very kind to agree to rewind the transformers for me using the original specifications, but with Teflon insulation. The measured performance of the amps went back to the original spec with the restored input trannies.

The amps came with the standard battleship gray faceplates of all the Telefunken studio gear of the time. I had the plates replicated but with a chrome finish, which looked more in place in a domestic setting.

I have compared the three vintage amps I own for driving my restored Quad ESL electrostatic loudspeakers and a pair of Tannoy SRM10B studio monitors. The Leak TL12.1 has a lovely midrange; the bass is a bit soft, but it sounds very engaging and musical. The Brook 12A has a more detailed sound, with more clarity and transparency, especially in the upper registers. It is really lovely for strings and vocal. As for the Telefunken V69a, these amps use pentode output tubes, whereas the Leak has triode-connected KT66 and the Brook has directly-heated triodes. The V69a have better bass, with more impact and a more solid foundation. Music takes on a larger scale. This amp is also very detailed and transparent, but sounds a bit lean when compared to the Leak. I feel they are tonally more neutral though. I would prefer the V69a for rock and large scale orchestral music, the Brook for chamber music and female vocalists, and the Leak if a warmer sound is desired.

Going back to my day to day system: after moving back to Hong Kong from the US, the conrad-johnson PV10a preamp and Aragon amplifier now needed step-up transformers. Having  upgraded my front end with a Michell Orbe turntable, Graham 2.2 arm and Lyra Helikon cartridge, I wanted to improve the other parts of the system as well.

Michell Orbe turntable.

I first met Tim de Paravicini at the Heathrow Penta Hi Fi show in the mid-1980s. He demonstrated his amplifiers with a Revox reel to reel tape player and stacked Quad ESLs, which was certainly unusual at the time and hard to forget. I’d kept in touch with him from time to time, and had always wanted to own his designs. During a trip to London, I went to Walrus Systems in London (now closed) and auditioned some of the EAR amplifiers. I ended up buying the 834P phono stage and the V12 integrated amplifier. The V12 was interesting as it used parallel push-pull ECC83 small-signal tubes for output! The current incarnation uses EL84s, and I have not heard it, but the original version had a rather distinct sonic signature. They actually worked rather well with the ESL, giving a very transparent, involving presentation.

As I got more into vintage audio, I found out that I could buy non-functioning or poorly functioning audio components, restore them to original specifications, and sell them for profit.  Since I have more fun restoring and optimizing them than keeping them, this was a good way to sustain the hobby without the headache of finding somewhere to store the equipment. Hong Kong has a very vibrant audio scene and it is very easy to sell vintage and good-quality audio gear. For popular items, I could usually sell them within a day of placing an ad on the popular Review33 website. I was able to source equipment through classified ads abroad and this allowed me to gain knowledge through experimentation to find the best components for restoration.

I also got to know various local artisans such as transformer makers that few people knew existed. Various Leak and Pye amplifiers came and went, and my hobby was financially self-sustaining. I also started to look into turntables, specifically Garrards. My first 301 came about after I spied a Schedule 2 machine on a slate plinth (made by the now defunct Slate Audio) with an SME 3012/II arm and Clearaudio cartridge at a second hand shop in London for the grand price of 1000 pounds. The turntable had already been serviced and the whole thing was plug and play. I sold the cartridge and mounted my Lyra Helikon. It had the drive and the solidity that I felt was lacking in the Orbe. The music had more presence due to the improved dynamics. I decided this one was a keeper and sold the Orbe instead. I subsequently upgraded to a late grease-bearing model, selling the Schedule 2 to a Japanese enthusiast for a good price. As for the SME, as it had a plastic knife-edge bearing, it was a good excuse to upgrade to a bronze knife, and I rewired the arm with silver wire and added a bronze base for good measure. I stayed with this table for 15 years, only recently exchanging some of its parts for a Classic Turntable Company 301. The superior main bearing, sturdier chassis and perfectly balanced platter brought a huge improvement. The improved speed stability results in better dynamics and tonal stability, the lower noise floor manifests as better transparency, and the frequency response also became more extended. This turntable is probably the greatest bargain on the market, especially when compared to the reissue 301 from SME.

The SME reissue of the legendary Garrard 301 turntable.

I left academia after six years, having experienced the SARS epidemic while working at a public hospital. It was an experience I thought at the time I would never see again, but how wrong was I! I was also totally fed up with the politics of academia. After a few years, with the kids getting older, I thought it would be a good idea to move to a larger apartment closer to work. It was a perfect excuse to realize my long-planned project: horn loudspeakers.

As the apartment needed to be gutted and totally renovated, I engaged a friend who was an acoustical architect to design the lounge (my wife is an architect, but she was very tolerant!). This friend worked for a number of years at the Arup Group in the UK and was responsible for the design of a number of concert halls and performance venues before returning to Hong Kong to set up his design firm. He also advised the late Mr. Winston Ma (former owner of First Impression Music) during the construction of his listening room near Seattle in the late 1990s. I got to know my friend when I wanted to use a concert hall he designed for a recording session. The hall quickly gained a reputation as having the best acoustics in the territory.

After the first site visit of the new apartment, he liked what he saw, since the room was irregular, and had no parallel walls but had the correct dimensions. He designed the air conditioning system, a subject of great importance to me as AC noise has always been a problem in many recording venues, so much so that we try to avoid doing recordings in the summer. Four-inch acoustical foam was placed strategically inside the walls and the ceiling. He also designed a ceiling to break up the standing waves, a design that sent my wife into a tizzy, and which the contractor declared was impossible to build. We ended up with a compromise, a ceiling that slopes at different angles in four directions. It actually does not look so weird once we got used to it, but it always elicits some reaction from new visitors.  He even designed the LP shelves on one wall to control the first reflections from the loudspeakers, with the records stored at a precise angle of 23 degrees.

The built in bass trap doubles as a storage unit (or is it the other way around?). The idea was to make it a normal living room with only subtle hints of acoustical treatment. When I check the RTA (real time analysis, a measurement of the frequency spectrum of an audio signal) from time to time, I am still amazed at the smoothness of the frequency response. And the AC is completely silent. Most importantly, being in an apartment, the room is soundproofed with a subfloor floating on rubber insulation (to isolate it from the walls, which transmit noise to other floors of the building), and the same type of doors that are used in recording studios were installed for the front entrance and the corridor leading to the bedrooms.

In the meantime, a pair of new horn speakers were planned. I had heard various horn iterations over the years in friends’ systems. Trips to Tokyo also presented opportunities to visit horn builders as well as antique audio dealers. I visited Jean Hiraga in Paris while he was still the editor of the magazine La Nouvelle Revue Du Son. He had set up at the time a pair of Altec A5 Voice of the Theatre loudspeakers, with his own crossovers, driven by Hafler solid state amps (no 300Bs!). The source was the original Philips CD player (probably modified, but my French at the time was not good enough to ask for details). Not exactly how I imagined it would be given his reputation. However, the sound was quite a revelation. Very dynamic, life-like and musical. He gave me a tube data manual (in French) as a gift. I also visited La Maison de L’Audiophile during that trip. Jean subsequently visited Hong Kong and gave me advice while I was setting up my horn system.

Altec A5 loudspeakers, “The Voice of the Theatre.”

During a trip to LA, I visited Dr. Bruce Edgar, creator of Edgarhorn loudspeakers. He was a very kind man and full of knowledge and experience. Unfortunately, he was in poor health at the time, having just got out of hospital after a leg infection, but he still spent an afternoon with me. I finally settled on the combination of an EV (ElectroVoice) T350 tweeter, a JBL2450 midrange (picked up at a good price in Hollywood) and Altec 515C bass drivers. I had trouble finding a good pair of vintage 515C. I then found out that an outfit called Great Plains Audio was servicing Altec drivers, and they had just started to produce some new drivers. I called the owner and explained to him what I wanted, but he was a bit bemused to learn that I wanted the Alnico version. He could not understand why since he did not believe it was in any way better than the ferrite version, and it loses magnetism over time. Anyway, I convinced him that there was a market for it, and he agreed finally to produce a prototype. Months passed, and he finally contacted me, telling me that he had a pair of prototypes that performed to the original spec. I bought them, and the 515C has been a regular item on his catalogue ever since.

I had considered various high-frequency drivers such as the JBL 077 and various Fostex models, but I had been impressed with the sound of the EV T350 at a friend’s place. Pretty much the only thing that can go wrong with these drivers is the voice coil, and amazingly, EV still produces these phenolic diaphragms. I bought a pair of 400 Hz rectangular exponential horns and reflex bass cabinets from a builder (Tatematu Onko, no longer in business) in Japan, the latter designed specifically for the 515C. I decided to use active crossovers, which allows for easy adjustments, maximizes sensitivity of the speakers and avoids adding reactance. I built a three-way crossover from Marchand Electronics initially, and subsequently switched to an Accuphase F-25 analogue frequency divider.

To backtrack a bit, a few years before I started the horn project, I got to know Allen Wright.  In my quest to learn more about amplifier circuits, I came across his writing on the internet.  Allen was an Australian guru who started his career as a technician at Tektronix. He designed the amplifier used in oscilloscopes, which were all tube-based in those days. These amplifiers needed to be extremely quiet and linear up to the megahertz range. He then decided to tackle audio and set up his own company, Vacuum State Electronics. He was very well respected within the DIY circle, and was in high demand for doing modifications and upgrades, as well as consulting for manufacturers.

He was developing his Realtime Preamplifier at the time, and wanted beta testers to iron out problems. I became one of his 10 beta testers, and was sent the components and the chassis to build the preamp. The design is very complicated, with a phono section that has an input sensitivity of 0.1mV. It is a dual mono, balanced differential design based on the E88CC tube. It has a shunt regulated power supply. Allen had a set of principles that he steadfastly adhered to. These included:

  1. A fully differential circuit.
  2. Zero negative feedback.
  3. Internal wiring with the thinnest conductors (solid wire and foil), preferably in pure silver
  4. He advocated using the cheapest RCA plugs and sockets (the conductors in audiophile connectors are too thick), or preferably, the Lemo Redel connectors (non-magnetic connectors normally used in MRI scanners and the defense industry).
  5. Teflon dielectric.
  6. All electrical “anchor points” are tightly regulated, which means the extensive use of current sinks and current sources to achieve the highest impedance possible.
  7. Choke-filtered power supply with solid state rectification. Fast-recovery diodes for high voltages, Schottky diodes for low voltages.

Vacuum State Electronics Realtime RTP3D preamplifier.

The whole experience was an excellent learning exercise, not only in the theory of audio electronics, but also in the art of point-to-point wiring construction. It took a good two years to finalize the prototype. The preamp is very quiet, dynamic and tonally neutral. I used it as my phono preamp for several years before buying a factory built RTP-3D version. Last year, I modified the prototype to serve as my tape head preamplifier.

For power amplification, I am using two pairs of Allen’s DPA300B tube amps. These amps have a differential input stage using a pair of the Russian 6H30Pi in cascode to drive a pair of 300B power tubes in push-pull configuration. These amps serve the tweeters and mid-range drivers, while a Mark Levinson No. 27.5 amplifier drives the bass.

Back to the loudspeaker discussion: a few years ago, I was introduced to a friend who had built a speaker system using field coil drivers made by G.I.P. Laboratory in Japan. These are recreations of the ancient Western Electric drivers, and are extremely expensive. The system had very impressive dynamics, but he was still working on integrating the various drivers, and the system was not very coherent as a whole.  However, what it did do well got me interested in field coils. [A field coil loudspeaker uses an electromagnet which needs to be powered by DC, as opposed to more conventional speakers that use permanent magnets. – Ed.]  The GIP drivers were out of my price range, but Line Magnetic in China also produces similar drivers at a somewhat lower price level.

However, I don’t believe 80 years of advances in science and engineering could not improve upon these ancient designs.  Classic Audio Loudspeakers in Brighton, Michigan produces a line of modern field coil drivers using state of the art materials such as beryllium diaphragms, and the designs are based on Altec and JBL drivers. This meant I could get drop-in replacements to use in my current set up with minimal adjustments required. After detailed discussion with John Wolff, the designer of these drivers, I bought a pair of 6475, which is based on the JBL475, the consumer version of the 2450, and a pair of 1501, based on the Altec 515.

Classic Audio Loudspeakers 6475 driver.

The higher breakup frequency of the beryllium diaphragms allows me to operate the midrange drivers up to a higher frequency, and I moved the crossover frequency up an octave to 7kHz. There was an immediate and marked improvement with the new drivers.  There is more detail and the dynamics, both at the micro and macro level, are greatly improved. The bass notes are faster and more tuneful. One can perceive the vibrations of the membrane of the tympani after each strike of the mallet. The tonal color of the instruments seems more natural and real.

I also changed from the T350s to the Acapella ion tweeters, something I had been very interested in doing ever since I heard them several years before. These tweeters use high-energy electrical plasma to vary air pressure and create sound.  What I liked about the T350 is that the phenolic diaphragms avoid the hard edge that metal diaphragms can impart on the high frequencies. Yet the ion tweeters go further and impart a totally natural, ethereal quality to string tone, female voice and percussive instruments. The better high-frequency extension also gives an enhanced perception of space and depth.  I estimate that the ion drivers made the greatest difference to my system, even though the frequency response of my ears rolls off above 12 kHz!

Acapella ion tweeter.

As I feel I have finally accomplished a satisfactory result with my speakers, I have moved on to deal with the recordings that I have made over the years. I needed a master recorder for editing and playback of the tapes. The Nagra IV-S is good for neither task; its playback electronics are more of an afterthought, and it does not allow for precise positioning of the tape for editing. The Nagra T-Audio recorder was initially developed as a scientific instrument, and later adapted for the television and film industry. Due to its substantial cost when it was introduced, it was too expensive for most music studios. The listed price in 1983 was £26,000, enough to buy a modest house in London!

Luckily, by the mid-2000s, analogue had fallen out of favor, and I was able to pick one up, fully refurbished with new heads, from Nagra for 8,000 CHF (about $8,800 US). I was attracted to its small footprint and the amazingly precise mechanical function, which makes tape editing very easy. However, the playback electronics of the machine, while competent, are not up to audiophile standard. The extensive use of 1980s-vintage op-amps and complicated compensation networks give the sound an unnatural, electronic character, although the dynamics and scale of the sound are outstanding.

Nagra T-Audio tape recorder.

There is now a trend for audiophiles to bypass the native electronics of professional recorders, and this was what I did. I wired the playback head with solid core pure silver wire directly to my prototype preamp, after modifying the RIAA EQ network for IEC and Nagramaster equalizations. (Most commercially available 15-ips tapes nowadays use IEC EQ, and all my own recordings use Nagramaster EQ.) It took some experimentation to optimize the frequency response, but the end result is highly satisfactory. The writeup about the modifications has been published at my group’s website (the Asia Audio Society) for those who are interested in the technical details. Tape playback avoids the pitfalls of LPs, such as distortion, noise and dynamic compression. It also sounds more natural and musical than the majority of digital recordings.

Commercial recordings are becoming available on 15-ips reel tapes from companies such as Tape Project, Analogue Productions and others. I also have a collection of master tape copies of some of my favorite music, which I have obtained from a couple of recording engineers in Europe.

I feel I have finally arrived at a sound that I find quite satisfactory, and I can just enjoy the music without worrying about what I need to do next (for a while).

However, I have been neglecting my turntable for quite a while! And I have not even started looking at digital…

Adrian Wu’s current system.

Modifying the Nagra T-Audio tape recorder to use an external repro head preamplifier, by Dr. Adrian Wu

My first encounter with reel to reel tape recorders came in the late 1990s when I bought a Nagra IV-S with QGB 10.5″ reel adapter. I had already been interested in high fidelity audio for 15 years by then, but I was introduced to the world of audio recording by some friends after my return to Hong Kong in 1997. I disliked the quality of Redbook digital, and high definition digital was still new at that time and the equipment was expensive. Analogue recorders, on the other hand, were very cheap, and I was able to buy a large lot of Ampex studio recording tapes at a close out price. Used aluminum reels could be bought for US$1 each in surplus stores in Hollywood ! Over the following 7 to 8 years, we made dozens of recordings, mostly orchestral and some chamber music. After moving to a larger apartment 12 years ago, I had more space and wanted a master recorder for editing and playback. The IV-S is good for neither task; its playback electronics is more of an afterthought, and it does not allow for precise positioning of the tape for editing. The Nagra T-Audio recorder was initially developed as a scientific instrument, and later adapted for the television and film industry. Due to its substantial cost when it was introduced, it was too expensive for most music studios. The listed price in 1983 was £26,000, enough to buy a modest house in London ! Luckily, by the mid-2000s, analogue has fallen out of favor, and I was able to pick one up, fully refurbished with new heads, from Nagra for 8000 CHF. Still a substantial sum, and about twice the going rate for a Studer A80 at the time. However, I was attracted to its small footprint and the amazingly precise mechanical function, which makes tape editing very easy.

The teflon coated silver wires are soldered directly onto the playback head at the headblock.

At around the time I bought the machine, The Tape Project in the US started to release commercial recordings on 15ips open reel tape. In the past, we were only able to get professionally recorded materials on bootlegged copies of master tapes, usually production masters, distribution masters or safety masters. One had to know the ex-engineers who possessed these tapes, and convince them to make copies for you (for a price). The Tape Project brought this into the mainstream, with fully licensed copies made from session masters provided by record labels. Soon, others joined in the fray, with some small record companies releasing their old analogue recordings (Opus 3, Foné), others licensing famous recordings of yesteryear (The Tape Project, Analogue Productions), and companies actually recording new materials for release on tape (Yarlung Records, Master Tape Sound Lab, Chasing the Dragon). The Tape Project managed to license two famous Decca recordings, thanks to Mr. Winston Ma of First Impression Music. The Suite Espanola in particular is a recording masterpiece by Kenneth Wilkinson, and it is well worth getting into reel to reel playback for this recording alone. Apparently, it is extremely difficult to convince Universal Music, the owner of the Decca catalogue, to license material for tape release, which Mr. Ma managed to do. Up to this day, these are the only two Decca recordings released in tape format that I am aware of. To be honest, it is much easier to pirate a high definition download than an analogue tape, and audiophiles would always want a first generation tape if given a choice, so their fear is misplaced. Happily, Decca also made recordings for RCA during the 1960s, and some of these wonderful recordings have been made available by Analogue Productions.

Dan Schmalle (a.k.a Dr. Bottlehead), one of the founders of The Tape Project, also uses a T-Audio. He advocates using an external head preamplifier to bypass the player’s native repro electronics. I was fascinated by this possibility and decided to experiment. I contacted Tim de Paravicini in the UK, whom I have known since the mid-80s, since he is well known for modifying tape recorders and supplying the electronics for some of the best recording and mastering studios in the world. Doc B’s approach is to disconnect the cables that run from the head to the repro electronics at the back of the machine and solder these to connectors installed on the spare holes on the back panel (the machine has two spare holes for the optional 30ips copy output). He runs another set of cables from these connectors to his head preamp. Tim thought this was a bad idea, since he predicted that noise would become a problem. Tim’s opinion was that the sound quality of the native electronics is mediocre, but actually quite respectable for a studio machine. He could improve the sound by modifying the repro electronics, but I would need to remove the boards and send them to him. Being habitually paranoid, I was afraid something could go wrong and the boards could get lost or damaged in transit. I contacted Nagra, but they informed me they no longer had any spares. I looked everywhere on line (and I am still looking), and although I have found lots of logic boards, I have never come across the audio board available for sale. Without the boards, the machine would not work. I thought about hand carrying the boards to him when I visit my son at Cambridge, but he still needs to send them back to me, as I would not be hanging around for weeks waiting for him to finish the work. As an aside, my recording partner sent him the repro boards for a Revox tape machine, and after the mods, the sound was magically transformed.

I just happened to have a spare phono preamp sitting on my shelf and I don’t have to invest in a new preamp, so it would be no great loss if I experiment with Doc B’s approach and fail. This preamp is Allen Wright’s RTP-3C. Or I should say a prototype of the RTP-3C. Allen was an Australian audio electronics guru who started his career at Tektronix designing the amplifier for oscilloscopes. Those were the days when the electronics were tube based, and needed to have a wide bandwidth in the megahertz range and with extremely low distortion. He subsequently built upon this basic circuit to design high performance audio amplifiers. He consulted for various manufacturers and did custom design work, and towards the end of his life, he started to manufacture his own equipment. He thought it was a good idea to publish his designs and to get feedback from enthusiasts. He recruited some “beta-testers”, me being one of the ten, and we were sent parts and instructions to build our prototypes. Everything was hard wired using the dark art of point to point wiring. It was an extremely complicated design, with twelve 6922/E88CC tubes. The phono stage only has one amplification stage, and the line stage only one amplification and one buffer stage. The design is fully balanced/differential without any feedback, including the passive RIAA equalization. The phono stage has 0.1mV sensitivity without resorting to transformers, and the bandwidth of the preamplifier is 1 MHz. It has a choke filtered power supply in a separate chassis, and the “Superreg” shunt regulators. It took us two years to build and optimize the final design. The cost was only 10% of retail, but the experience was priceless. After using the preamp for several years, I bought a factory built unit (with PCBs) in RTP-3D guise (the A and B iterations were never commercialized), and my original prototype has been sitting on my shelf ever since.

I plugged in the preamplifier for soak testing but after a while, two tubes blew. I replaced the tubes but they blew again. I finally figured out that the insulation pads of two of the LM317 regulators for the tube heaters have deteriorated, and their casings were shorting to the ground plane. I went ahead and replaced all the regulators just in case, and the preamplifier has been working fine thereafter.
The preamp has RIAA equalization for phono cartridges, but for tape, we need different EQ curves. I mostly use Nagramaster EQ for my live recordings, and most commercial releases use CCIR EQ. As I don’t have 7.5ips tapes or use other types of EQ, these are the only two I need. The CCIR EQ has a treble cut at 4500 Hz (a time constant of 35μs) during recording, but does not define a bass boost. The Nagramaster EQ defines a bass boost at 50 Hz (Tc = 3180μs) and a treble cut at 11,800 Hz (Tc = 13.5μs). The output of the repro head increases with frequency at a slope of 6dB/octave, which means the output doubles for every doubling of frequency. This is due to the physical property of magnetic tape playback. Therefore, the EQ for playback needs to have a low pass filter at the bass region starting after the bass boost, and a high pass filter to correct the treble cut. In the RTP-3C, the tube phono stage is a cascode, which for all intents and purposes has infinite source impedance, thus negating the need for feedback. The EQ calculations therefore only depends on the other resistive elements of the circuit. It was a simple matter of removing the components of the RIAA EQ and replacing them with a variable resistor. The resistance is adjusted until the output decreases by exactly 50%. The resistance across the resistor is therefore the resistance of the circuit. It is then a matter of dividing the bass time constant by the resistance to find the correct value of the capacitor to form the low pass filter. Although the CIRR curve does not specify a corner frequency for the low pass, the curve has to start from somewhere, and most recorders probably use a frequency of 25 to 30 Hz. There is also a “head bump” where the wavelength coincides with the width of the head gap causing resonance, which is usually at around 30 to 40 Hz with 1/4″ two track heads playing at 15ips. Experimentation is therefore needed to find the best value. For the high pass filter, it is a matter of dividing the time constant by the value of the capacitor we have chosen to find the correct resistor value. This is used as a ballpark figure to start our experimentation. By trial and error, I found that 0.34μF gave me the best looking low end response on CCIR, and 0.12μF for Nagramaster. To find the best resistor value for the high pass, I put in a 200R trimmer and adjusted until the frequency response is the flattest. To switch between the two EQs, I installed a DPDT latching relay and directly soldered the components onto the pins. I would love to use film and foil caps but there was just not enough space. Therefore, I used Kemet MKP caps and Halco precision metal film resistors.
Having defined the value of the EQ components is only half the battle. There is still the small matter of head loading. The inductance of the head, the capacitance of the cables plus the input stage, and the input resistance form a resonance circuit. If the resonance frequency is within the audio band, it will affect the frequency response. If used judiciously, it could be used to boost the sagging high frequency response. The recorder uses coaxial cables to connect the head to the repro electronics, and the cables have pretty high capacitance. When I measured the inductance of the playback head, I was astonished to find that it measured 670mH on the left and 690mH on the right. Most modern repro heads have inductance in the 100mH range, so this is rather high. This also means I don’t have a lot of room to add capacitance before the resonance frequency enters the audible range. By using the internal cables as suggested by Doc B (but extending them rather than soldering onto a connector), the resonance frequency ends up to be around 4kHz, and I needed to use a fairly low input resistance (23.5K per phase) to damp down the resonance. But this results in a 6dB drop at 16kHz, and 9dB down at 20kHz. Not a disaster, but could be better. The internal electronics of the T-Audio is pretty complicated and has all sorts of circuits to compensate for this, but this is anathema to my audiophile sensibilities. I left it at that for a while, and the sound is actually very good, without any obvious loss of high frequencies. However, the native playback of the machine does sound brighter and seems more dynamic, albeit more “electronic” and less organic than the tube preamp.
The one advantage of the RTP-3C is that it is a fully balanced design. Therefore, I can connect the head to the preamp in a balanced configuration, with the benefit of at least 60dB of common mode noise rejection if the components are well matched. I therefore twisted a pair of teflon coated pure silver wires together and soldered them directly onto the head block. With only 75cm of cable, the capacitance of this set up is 27pF. I played around with resistor and capacitor loading at the input, and managed to get a flat response to 16kHz and -1.2dB at 20kHz by loading with 15pF and 240K each phase. I called it quits at this point, being sick of the cycles of desoldering, resoldering, measuring and repeat. The frequency response using an MRL test tape at this point is +2.5dB at 32Hz, +1.2dB at 63Hz, flat to 16kHz and -1.2dB at 20kHz. The rest of the response is +/- <0.5dB.

Wiring is like a rat’s nest, but amazingly, this preamp is as quiet as a mouse !


So how is the sound ? Happily, Tim’s prediction did not come true. There is no noise whatsoever, only a soft tube rush if I put my ear against the mouth of the midrange horn. Compared to the native electronics, the sound is much more musical, with a greater sense of presence and palpability. The upper frequencies of the native playback seem harsh by comparison. The sense of space is eerie; the entry of the trumpets at the beginning of Leibowitz’s RCA recording of Pictures At An Exhibition (Analogue Productions) immediately showed the difference. The tube preamp gives the impression of distance and space, with the strings coming in in front of the trumpet, whereas the native playback presents a much flatter, two-dimensional view, with the trumpet placed more forward and without the sense of space surrounding the player. The timber of the instruments is more colorful and realistic, whereas the native playback tends to homogenize the sound a bit. A studio master copy of a Kondrashin recording of Shostakovich 10th symphony on Melodiya shows good layering of the instruments, the sound of the military drums at a distance giving a tremendous sense of foreboding. The scale of the sound can be overwhelming at times for those not used to hearing master tapes, as LPs and even commercial digital releases often have compressors and limiters applied. Bill Evan’s Waltz for Debbie released by The Tape Project gives a wonderful life-like presentation of the ensemble, the scintillating cymbals with rich overtones and excellent presence of the piano. Vinyl would not give such a solid impact to the piano notes, not even on my souped up Garrard 301.
With high resolution digital downloads now widely available, are there any reasons to go back to tape ? Is this pure anachronism, or another fantasy created by analogue diehards ? Admittedly, digital audio has made tremendous improvements since the days of perfect sound forever. They do sound ever more perfect than before, but this improvement only applies to newly recorded materials. Older digital recordings made with Redbook CD specifications would always retain their deficiencies, since up-sampling cannot rectify the problems created by anti-alias filtering, for example. The high frequencies lost to filtering, and the phase shift caused by the brick wall filter could never be undone. Ironically, analogue recordings transferred to high resolution formats using modern equipment can sound very good indeed. This depends on the condition of the master tapes as well as the skill of the mastering engineer and the care taken. In my experience, master tapes transferred without any compression to high bit rate DSD can sound extremely close to the analogue source. The availability of such transfers is still limited, and good DACs capable of fully realizing the quality of these high resolution formats are expensive. The best digital recordings are no doubt modern recordings made in high resolution digital formats. The sad fact is, the major labels nowadays are no longer investing money into making high quality recordings. Most labels no longer have recording teams and contract out the job to the lowest bidder. I doubt we will ever see the likes of Kenneth Wilkinson, Gordon Perry, Lewis Layton and Bob Fine again. And Kingsway Hall is but a distant memory………
And there is a ritual associated with analogue playback that endears enthusiasts. The periodic head demagnetization, head cleaning, threading the tape, splicing with a razor, cleaning the LPs, maniacally adjusting the VTA……… It keeps us busy. So, the argument is not so much digital vs. analogue, but finding the best way to maximize the pleasure from recordings made in the different era.

Musical Fidelity Trivista 21 DAC re-engineering pt 6 (final), by Ed Kwok

In this final part of the series I will talk about the (in)famous TriVista tube buffer and why you should bypass it.

What! I hear you say. Bypass the tube buffer? But the tubes are the reason for Trivista 21’s existence, right? I thought so too. Let me take you through the effort and expenditure I took to reach that conclusion. Let’s talk circuits. In the DAC section above we already discovered the output from the third op amp in the filter circuit is ready for output to the preamp. But instead of being made available at the back panel this signal goes through a unity gain buffer that contains the 5703 triodes. The 5703 triodes are not wired as traditional (and good sounding) cathode followers. Instead each channel has a pair of 5703 which form a long tailed pair in a discrete op amp configuration that also includes 7 bipolar transistors. Below are the improvements I made:

a) Matching the input valves: Performance of any long tailed pair hinges on perfect matching of the input devices so I purchased twenty JAN NOS 5703 and hand matched 2 pairs using an AVO valve tester. I did find the original valves were not matched.

b) Matching the NPN and PNP transistors in the second stage and output stage: originals were not matched at all.

Despite all this effort at a formal A/B test with and without the valve buffer all the Society members preferred the bypassed output with its much better transparency, communication of musical performance and far greater width and depth. I would like to try the tubes in a better circuit configuration in future and for now it was decided to permanently bypass the tube stage and disconnect the HT transformer to further reduce noise.

Figure 7: Trivista 21 (re-engineered)

Conclusion
After formal A/B comparison in a reference system we have determined that the re-engineered Trivista 21 is fully competitive with current DACs from Chord, Naim, Merging, Lumin. The secret is to correct the mistakes and use the correct (not just expensive) components. One last problem: now that the tube stage is disconnected do we still call it a Trivista?

Musical Fidelity Trivista 21 DAC re-engineering pt 5, by Ed Kwok

Now we get to to the heart of the project – the DAC section.

MF made some mistakes in the analog power supply and the op amp filters.  Below I will show you how to correct these mistakes and unlock tremendous improvements. Trivista uses a Burr Brown DSD1792A 24/192 DAC in PCM mode. This chip was state of the art in 2003 and boasts 127dB dynamic range and 0.0004% (-108dB) THD+N, which is comfortably beyond the performance required for CD audio. DAC chips are all quite cheap (tens of USD) on their own but they need good supporting circuits to make them sound good. TI published a reference circuit in the 1792 data sheet and I will refer to parts of it as we proceed.

+5V DAC chip analog power supply. DAC chips need separate clean +5V for the analog power pins. So why did MF supply the DAC chip’s analog power pins VCC2L and VCC2R from the dirty digital 5V power rail? After analysis confirmed by listening tests I concluded this was indeed a mistake probably made when they designed the PCB. There actually is a clean +5V rail supplied by a 7805 regulator with choke filtering that takes power from the already clean +15V analog rail but it is only used for the DAC chip’s VCC1. Get out your soldering iron and connect the DAC chip’s VCC2L and VCC2R pins to the clean analog +5V rail. You have just doubled your Trivista 21’s sound quality. For further improvement replace the 7805 regulator with something better. In this critical application the difference between a fairly good LM340A and a state of the art (in 2017) LT3045 is clearly audible in terms of transparency, resolution and spaciousness. If you want perfection you can use 3 LT3045 to power VCC1, VCC2L and VCC2R but you would need to make a piggy back board. Finish off with a sprinkling of OSCON on the DAC chip power rails. Don’t use OSCON for the internal bias decoupling caps because they have high leakage current. You have now doubled the sound quality again.

+15 and -15V op amp power supply. Each rail is provided by one 78/79 regulator taking power from the +-24 volt rails. Each regulator supplies both left and right channels. Putting in separate regulators for the left and right op amps would have cost USD5 more in components so this kind of cost cutting by MF is surprising. Unfortunately, there’s not much that can be done without seriously cutting up the PCB so I have left as is and merely upgraded the regulators to LM340. At least there is room to put in decent electrolytics.

Op amp integrator and filter. MF uses the reference circuit and I agree 100%. Some hobbyists claim they can come up with a better circuit, if they are so good they can go and design the DAC chip as well. However here is where MF made another mistake on the PCB (but not on the circuit). For some reason MF uses half of a 5532 dual op amp in all six positions instead of the recommended single 5534. That in itself is not a problem and maybe they had a lot of 5532 in stock. But they failed to disable the unused half of the 5532’s in the correct way. They wired both inverting and non-inverting inputs to ground, which ensures the output is driven at open loop gain and will peg itself at the + or the – power rail at random. Thus the non-working half of each 5532 compromises the working half. Correction requires track cutting to reconnect the inverting input to the output to regain stability. While you are working on the op amps why not use something better? The data sheet specifies the 5534 loved by big Japanese electronics companies who are the main customers. But the same circuit appears in OPA1611/12 data sheet so TI engineers know better. I am using LME49710 and LME49720 but if you use AD797 I would love to hear from you. While you are in there replace those cheap resistors and capacitors in the filters with your favorite precision types. I went with 0.1% Dale metal films with 5 and 15 ppm/C and hand matched 1% Phillips NOS polystyrene. There’s not much space to put in anything bigger/better.

Output buffer added. The output of the third op amp is ready to feed into your preamp. In the Trivista 21 this signal is connected to the input of the tube stage and is not available at the back panel. I added an LME49720 unity gain buffer stage so I could bring this clean signal to some extra phono sockets on the back panel to facilitate A/B comparison with/without the tube stage.

Figure 5: DAC  original                 Figure 6: re-engineered

Musical Fidelity Trivista 21 DAC re-engineering pt4, by Ed Kwok

Now let’s turn our attention to the main PCB.
Figure 3: Main PCB (original)

Decoupling capacitors – stick with ceramics but use low-loss non-microphonic C0G types
If you are reading this you are no stranger to capacitors. I will leave you to decide whether you are going to increase capacitance or stick with original values. I would like to offer the following suggestions.
a. High frequency decoupling: There are about 50 low quality 0.1uF disc ceramic capacitors providing power supply decoupling onto the ground plane. Replace these with 0.1uF ceramic C0G. Remember this is a digital board with a 50MHz clock so you need caps that are good to at least 1GHz. Save your plastic films for analog stuff.
b. Low frequency decoupling: There are about 25 Jamicon brand electrolytics ranging from 10uF to 1000uF. I would go for 105C rating since you don’t want to do this again in the next 10 years. I stayed with Nichicon UKA because some 3 terminal regulators are said to be unstable with OSCON on the output. If you use OSCON, please let me know how it went. Some electrolytics provide critical voltage reference to the DAC chip and I will talk about these in the appropriate section.

Figure 4: Removing the cheap original capacitors

Musical Fidelity Trivista 21 DAC re-engineering pt3, by Ed Kwok

1) Main power supply – quality choke filtered PSU, leave as is
Figure 2: PSU PCB (Original)

Power supply fanatics will be delighted to find large chokes on both the low voltage and high voltage analog power supplies. These chokes are bigger even than the power transformers. There are 2 main reservoir capacitors for each rail and they are wired in C-L-C arrangement with the chokes for maximum rejection of ripple, hum and other noise. The 24V rails will feed the 15V regulators for the op amps and the 90V rails will go through additional filtering before reaching the tube section. A 10V rail feeds the 5V regulator for the digital section and a 15V rail feeds the 12V regulator for the tube heaters; these rails do not have choke filters and probably do not need it. Best not to mess around with this superb design and just replace the old Jamicon electrolytics with new 105C rated components. I used Nichicon LGU at 50% bigger capacity and you should use your own favorite.

Musical Fidelity Trivista 21 DAC re-engineering pt2, by Ed Kwok

Trivista 21 circuit has several mistakes!!
I could not find any circuit diagrams on the internet, so I had to draw them myself by studying the circuit board. In the process I found several mistakes and shortcuts that absolutely prevent the Trivista reaching anywhere near its full potential. I was initially baffled and tried hard to convince myself that they were intentional. But after exhaustive engineering analysis backed by listening tests I had to conclude that they were indeed mistakes. I will highlight these in the appropriate section and show how they can be corrected.
Let’s get started with something all of us can see and that is the build quality. Trivista 21 build quality is excellent. Look at those beautiful double sided fibre glass PCBs with wide tracks and extensive ground planes. The wiring is terminated on the PCBs via proper termination pins and all soldered wiring is stress relieved with heat shrink. The last time I saw something this nice may have been during my days in military electronics.

What follows is quite a long article as I take you through each section and explain what I discovered.

Musical Fidelity Trivista 21 DAC re-engineering pt1, by Ed Kwok

Can the 2003 Trivista 21 be modernised to compete with today’s (2017) reference DACs? Enthusiasts have tried putting in expensive capacitors and op amps and some even offer their services for a fee. I applaud their efforts and generosity in sharing their work on the internet. But I wanted to go much further. When you peer inside the Trivista 21 you realise it is an extremely serious piece of equipment that demands an equally serious engineering effort to modernize it. This is not going to be a case of just swapping capacitors – this is going to be a total re-engineering. We will have to reverse-engineer the circuit, identify and correct all the weaknesses and deploy our components budget where it matters. With some work and USD 500 of components the Trivista 21 can emphatically withstand A/B blind testing against the very best DACs available today (2017) at any price. Provided you also bypass the tube section entirely!
To be continued.

Playback Blog moderated by Ir. Ed Kwok, C.Eng, MHKIE

The Playback Blog is for the technically minded audiophile who is prepared to go beyond commercially accepted standards in search of engineering perfection. Moderated by Ed Kwok, a UK qualified Chartered Engineer and patent holder with a military electronics background. If playback to you means spending hundreds of thousands on a system and having it set up by the dealer then stop reading now. However if you like meticulously engineered equipment based on proper application of scientific knowledge and you are happiest when you have a data sheet in one hand and a soldering iron in the other then read on!